Online Scheduling for My Wix Website
Posted on July 31, 2014 by Martina
We’re often asked if YellowSchedule can be embedded into a Wix Website. It works extremely well with Wix and it’s easy to do. Here’s a quick guide on how to get your Online Scheduling Widget onto your Wix website.
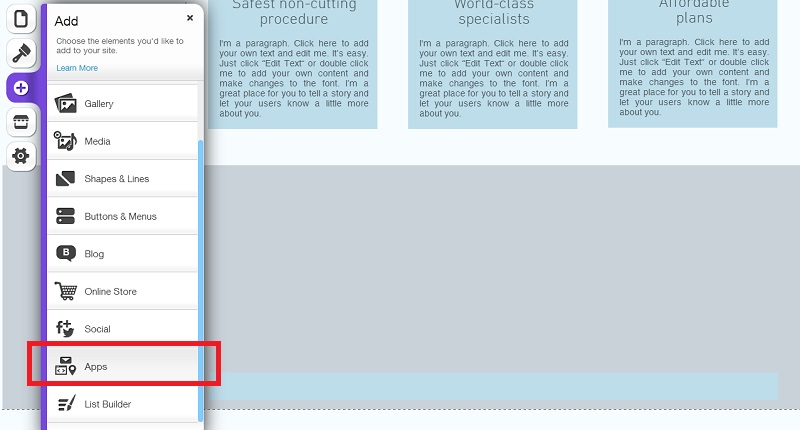
Step 1:
When logged into your Wix account, navigate to where you edit your Website. As per the image below, click on ‘Apps’
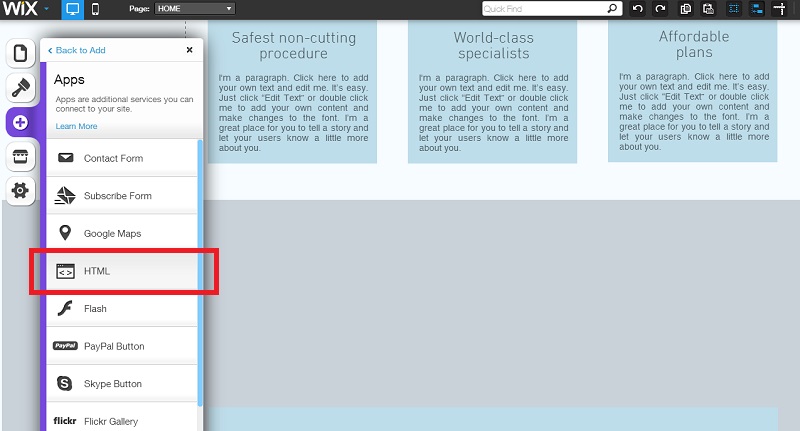
Step 2:
On the Apps menu, click on the ‘HTML’ option as below.
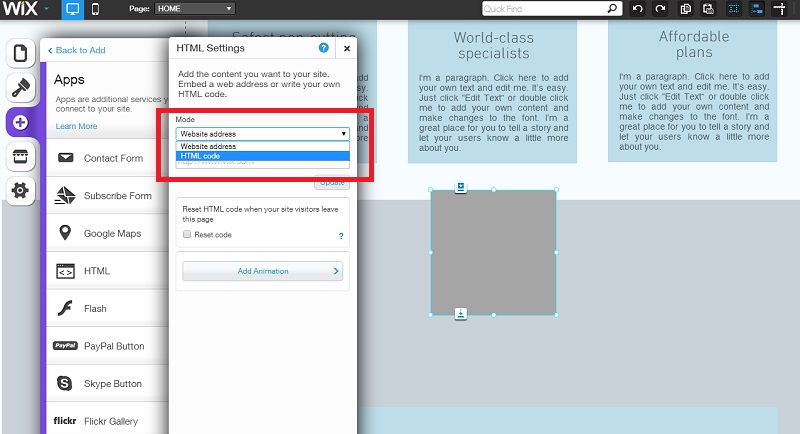
Step 3:
This will place a small gray box on your website. Double click on this box and the HTML dialogue box will appear. For Mode, please select the ‘HTML code’ option as per the image below.
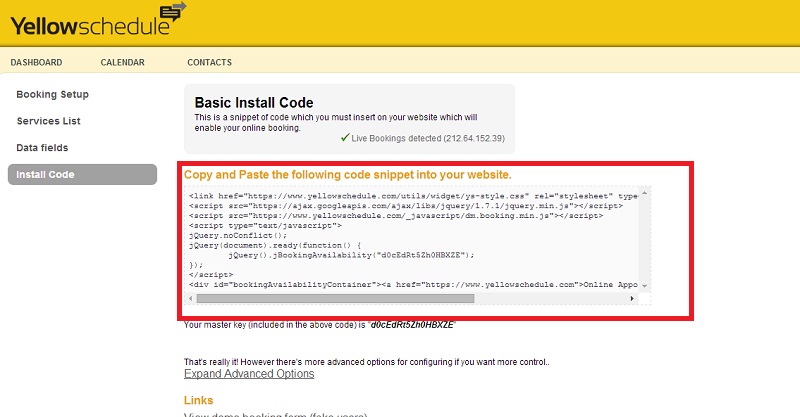
Step 4:
You’ll need to copy and paste the install code from your YellowSchedule Account into the html field. You’ll find this piece of code in your YellowSchedule Account, under the ‘Bookings Setup’ Tab on the top, and the ‘Install Code’ option on the left hand navigation. Copy the code highlighted in the box below.
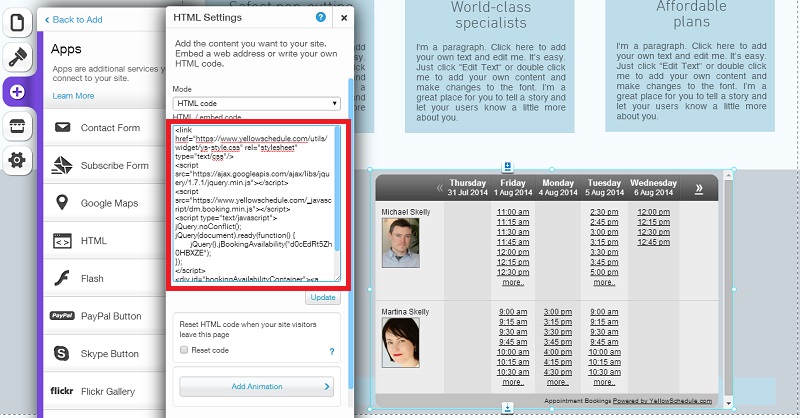
Step 5:
Paste this YellowSchedule code into the HTML box as per the image below and click the ‘Update’ button. Your appointment widget will show up on your screen as per the image below. You can simple drag the widget to the correct size and place it where you need it to be on your page.
That’s it, 5 steps and you’re done. Happy Scheduling!