How to Accept Payments Online For Your Appointments
Posted on March 4, 2015 by Killian
Billing your clients just got easier!
We’re really excited to announce the launch of YellowSchedule Payments which allows you to take payments from your clients directly via your YellowSchedule account.
Payments, deposits, prepayments and receipts are all handled simply and securely. Read on to find out more about this great new, highly requested, feature.
This can be set up through your appointment scheduling software in three simple stages:
1. Enabling Client Payments
2. Gathering Client Payment Details
3. Making Client Payments
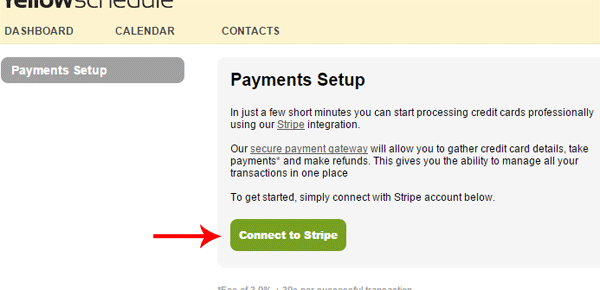
Stage 1. Enabling Client Payments
Enable Client Payments is located in the settings menu on your appointment scheduler. Once you have accessed ‘enable client payments’ you will be asked to ‘Connect to Stripe’ – our payments partner.
Step 1:

Step 2:
When you click connect to Stripe you will be redirected to a Stripe form for completion where you will be required to enter a few details about your business.
Step 3:
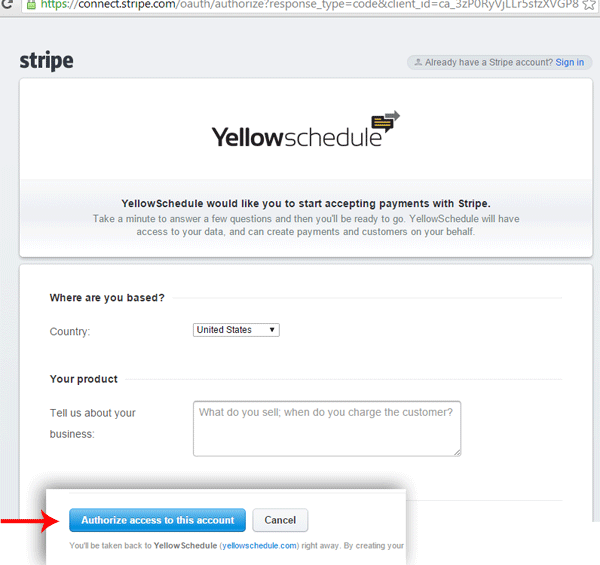
Upon completions scroll to the bottom of the form and click ‘Authorize access to this account’. By authorizing access to this account you can grant different access levels to users.
These include:
– Full Payments Access.
– View Payments Only. (Staff can see payments, but not create or refund them).
– No Payments Access. (All payments details will be hidden for those staff).
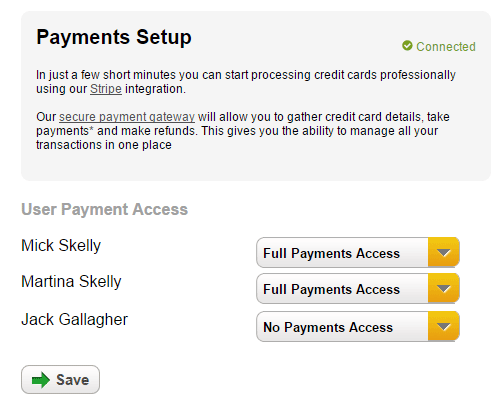
Once access has been authorized your YellowSchedule appointment software and Stripe payments account are now linked allowing you to start charging clients!
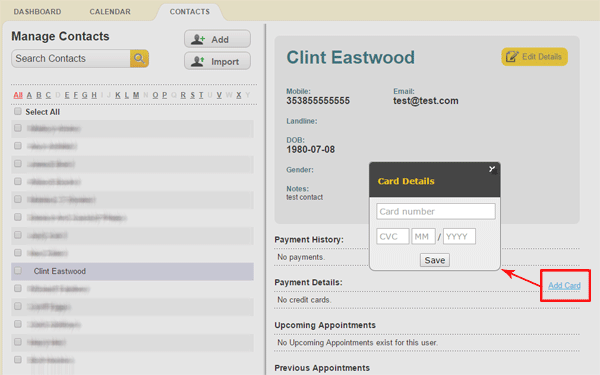
Stage 2. Gathering Client Payment Details
There are two ways you can gather a clients payment details for charging them.
You can manually add them or gather their details from their online scheduling appointment on your booking calendar.
2.1 Manually Adding Card Details
Using your client scheduling software go to ‘Contacts’. When viewing a contact , click the ‘Add Card’ option on payment details. Now you can manually enter the payment details for a client.
2.2 Gather Payment Details via Online Booking Calendar
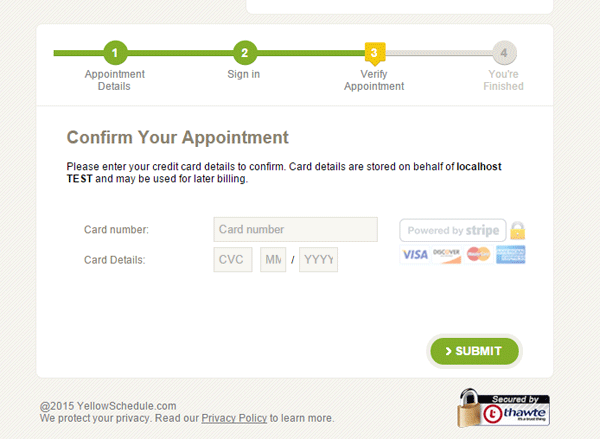
Go to ‘Online Booking Setup’. Scroll down to ‘Client online booking validated by’ and change the validation method to ‘Credit Card’ option.

Once you have changed your validation method to ‘Credit Card’ clients using the online booking calendar will be required to confirm their appointment by entering their payment details like so;
Step 3. Making Client Payments
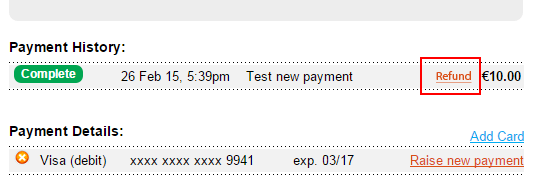
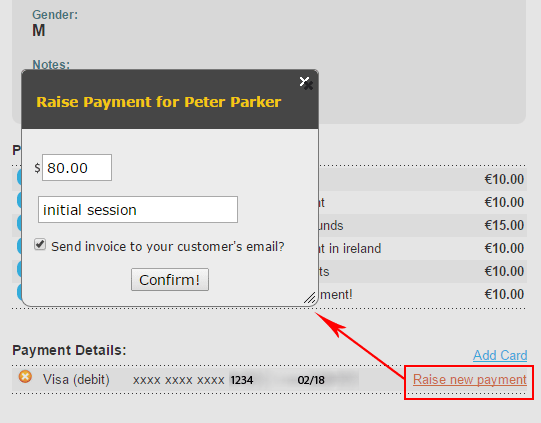
Raising new payments for a client is easy. When viewing a contract with billing details already included, simply click the ‘Raise new payment’ option and enter the amount and an optional description. The description will show up on the receipt which is emailed to the client.
Payments are never automatically taken allowing you to manage when payments are made.
Refunding a payment is just as easy. Highlight the payment and click ‘Refund’ option. You will then be prompted to enter the amount you wish to refund.
Start organizing your business Today!